For the month of January Jelena from A Kingdom for a Cake invited us to start this year with a dreamy celebration cake. She challenged us to make the Esterházy cake a.k.a the Hungarian dream. What better way to start the year than with a sweet dream?
According to Wikipedia, ‘Esterházy torta is a Hungarian cake named after Prince Paul III Anton Esterházy de Galántha, a member of the Esterházy dynasty and diplomat of the Austrian Empire.’ If that’s not enough to inspire a sense of trepidation as you set out to make this cake, I don’t know what will. And, I have to say… it did prove fairly intimidating! Whether it was Mercury Retrograde or just a bad day in the kitchen, I was really tested with this baby. I’m not kidding when I say that I gave up on it at one stage… for all of about half an hour, but determination kicked in and I resolved to get it done no matter what. It was 10pm when I finally turned out the kitchen light!
I think my first mistake was in trying to halve the recipe* – which I did do successfully in the end – but there was a fair amount of guess work in some of the conversions. That aside, the biggest disaster I encountered was with the hazelnut cream which should have been a breeze… but no. For some reason the method provided just didn’t work for me… twice… This, by the way, was the point at which I gave up. I immersed myself in some tele for a while to soothe my bruised pride. Then, halfway through a Miranda episode, I got to wondering if maybe it was just the directions that weren’t working for me. So I threw the pinnie back on and resorted to a method I’d used once before (which is the one I’ve used in the recipe below) and this time, thankfully, it worked.
But it didn’t stop there. When it came time to beat the egg whites they ended up weirdly fluffy like soap suds, so I had to do a second batch. By this stage I was feeling mighty bad about all the food wastage, not to mention the ever-increasing cost of ingredients, but I battled on regardless. As day turned into night, I gradually got all the components done and assembled the cake ready for the final decoration (the spider’s web) which I left till the following morning. And, not surprisingly, that also proved to be a trying moment – I’m not great at piping at the best of times and the lines of the web took on a life of their own thanks, in no small part, to ridiculously shaky hands!
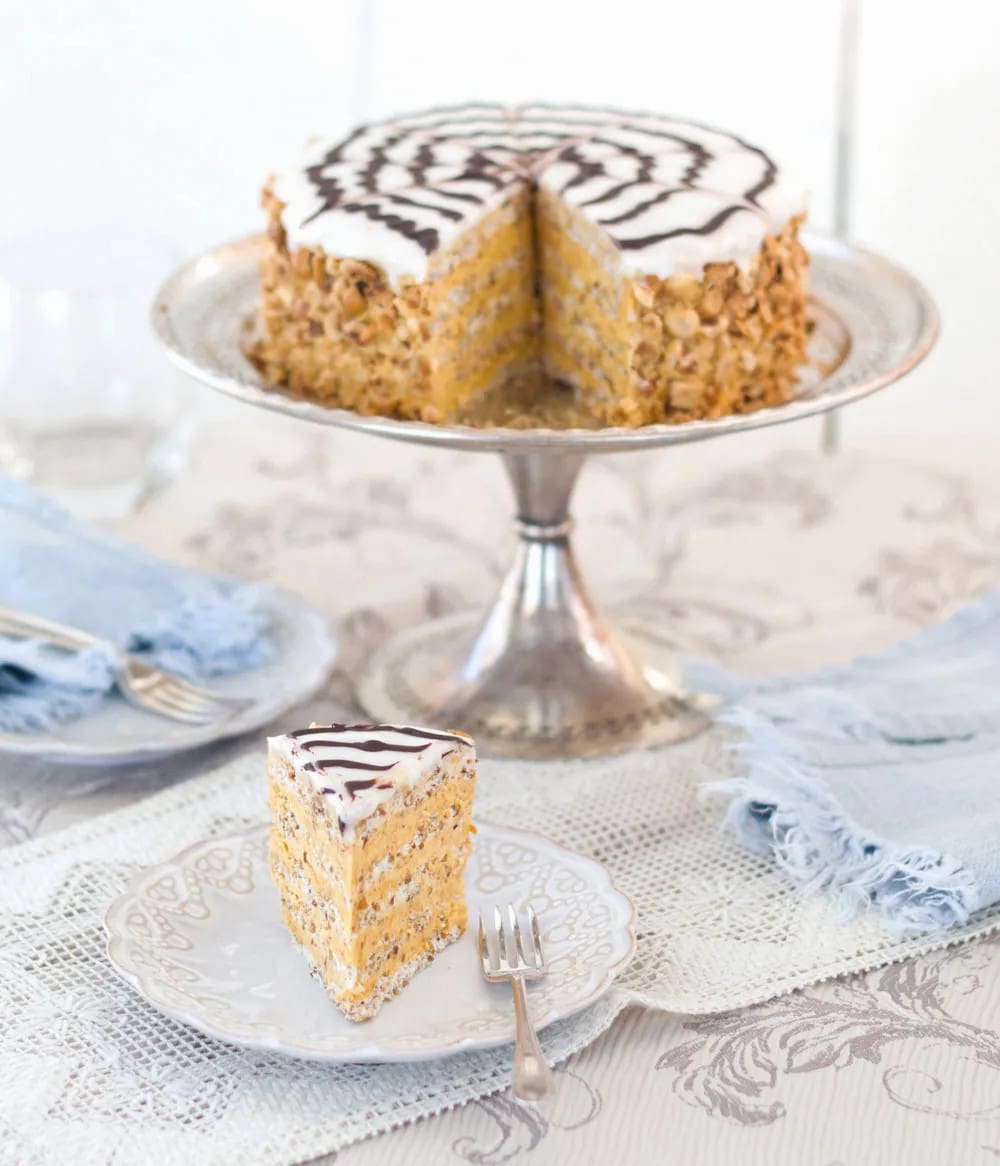
I am SO pleased I persisted though – despite a web with some serious jitters, the finished cake was a show-stopper and the interior (the bit that really matters) was perfection. If you like Ferrero Rocher, you’re gonna love this cake – 5 layers of hazelnut meringue, sandwiched together with hazelnut butter cream, topped with a lemon icing and covered with toasted hazelnuts on the side. It’s the culinary equivalent to climbing Mount Everest, but I can promise that once you’ve ticked this one off your list you’re going to feel like you can tackle anything!
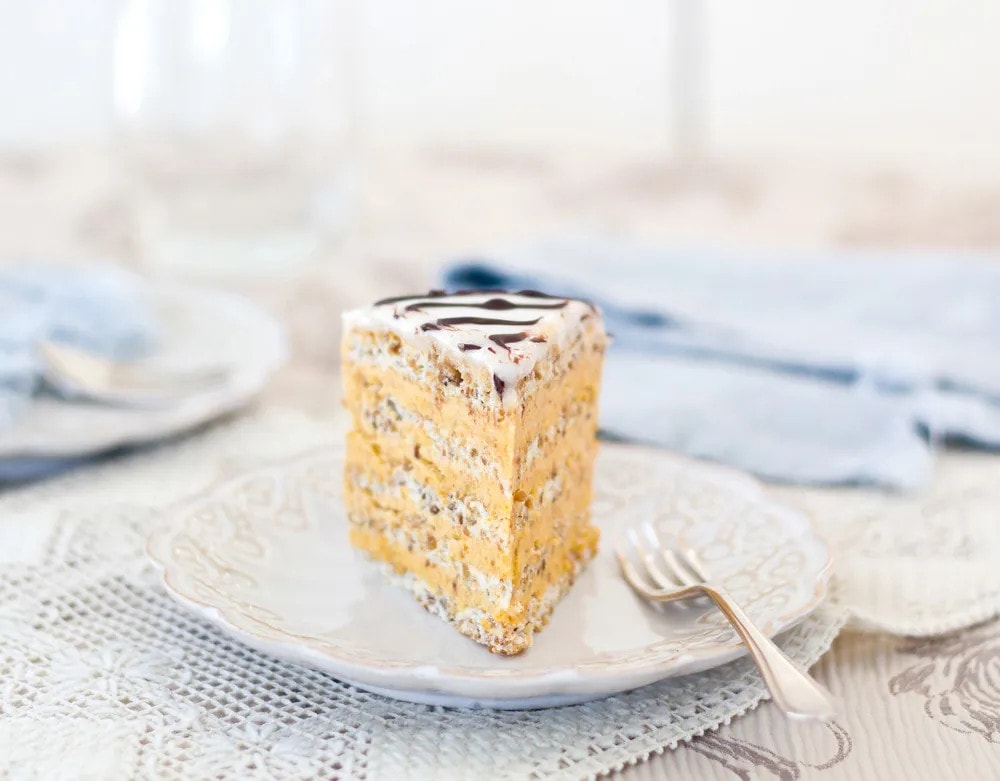
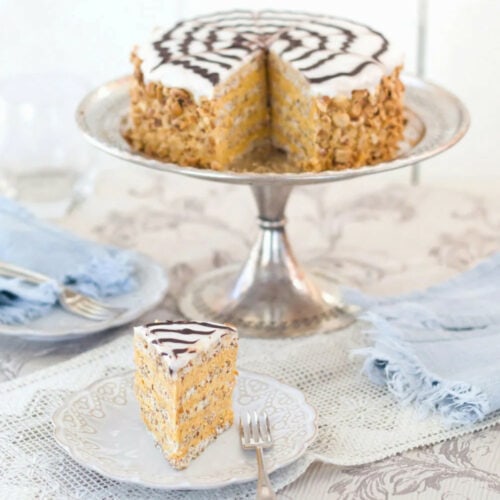
ESTERHAZY TORTE
Equipment
- 1 Grinding Machine
Ingredients
Hazelnut Meringue ‘Sponge’ Layers
- 12 large egg whites
- 1 cup plus 1 tbsp caster (superfine) sugar, PLUS 2 tbsp vanilla sugar or just use regular caster sugar
- 2½ cups ground hazelnuts
- 2/3 cup plain (all purpose) flour (I used gluten-free flour)
Hazelnut Cream Filling
- 12 large egg yolks
- 1 cup plus 1 tbsp caster (superfine) sugar, plus 2 extra tbsp vanilla sugar (or just use regular caster sugar)
- 1 -1/3 cups butter, at room temperature
- 1½ cups toasted ground hazelnuts
Apricot Jam Glaze
- Around 3 tbsp apricot jam
- 1 tsp water (I used some rum instead)
Lemon Icing
- 2½ to 3¼ cups icing (powdered) (confectioners’) sugar
- 2 tsp sunflower oil
- 3-4 tsp lemon juice
- Around 4 tbsp hot water
Chocolate Piping and Decoration
- ¼ cup dark chocolate
- 1 tsp oil
- ¾ cup roughly chopped hazelnuts
Instructions
Pre-baking notes:
- Given the time needed to complete this, I recommend you prepare the hazelnuts (roast, divide and process) twodays out from serving, and keep them in the fridge. The day before serving, make the meringue discs and thehazelnut cream filling; assemble the cake and put it in the fridge overnight. The day of serving, make the lemonicing and chocolate decoration.
- Hazelnuts are used throughout this recipe and the amounts are listed individually within the differentcomponents below. All up, you will need 4¾ cups hazelnuts.
For the Hazelnuts (You can prepare the hazelnuts (which takes a good hour) the day before and store them in the fridge).
- Place the hazelnuts on an oven tray in a cold oven, increase the temperature to moderate 180°C/350°F. It’s important the nuts are well toasted, or the cake won’t be as successful. You’re looking for a definite aroma to come out of the oven; the hazelnut skins to go dark brown (see image below); the hazelnuts themselves to go a caramel colour, but make sure they don’t burn – try one occasionally to check. It should take about 15-25 minutes, depending on your oven. Remove and let them cool.
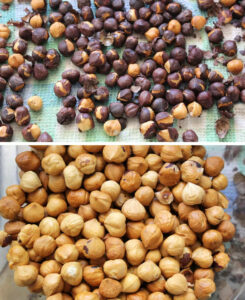
- Once cool, you can easily separate the nuts from the skins (see image above). Take out ¾ cup (3½ oz) (100g) toasted nuts and roughly chop them. These will go around the cake at the end.
- The rest of the nuts need to be ground. A grinding machine is best since a food processor might turn the hazelnuts into a paste. If you are using a processor do it in short pulses so they do not have the consistency of peanut butter but of coarse meal.
- Divide the ground hazelnuts into 2 batches – one batch of 2½ cups for the meringue, and 1½ cups for the hazelnut cream filling. If you’re preparing this ahead of time, refrigerate or freeze the nuts, as they go rancid fairly quickly.
For the Hazelnut Meringue Layers (These can also be prepared the day before and stored in an air-tight container).
- Preheat oven to a moderate 160°C/325°F. Cut baking paper into five squares large enough to draw a circle of 10 inch (25cm) in diameter on the squares. Have them ready along with at least one baking tray (which you keep out of the oven for now).
- Add the flour to the batch of hazelnuts you’ve kept aside for the meringue and stir to combine.
- With an electric mixer beat the egg whites (ensure your beaters and bowl are scrupulously clean). When they reach soft peaks, gradually add the sugar and vanilla sugar (about a tablespoon at a time) until stiff peaks form and the mixture is glossy.
- Fold in the hazelnuts mixed with the flour until just combined.
- Place one piece of the baking paper you’ve prepared (with the drawn circle underneath to act as a guide) onto an oven tray. Delicately spoon one-fifth of the meringue mixture into the circle, trying to keep the edges neat and the top level (see image below – I was in a hurry and didn’t have time to neaten up the edges, but ensuring neat edges makes it easier when you come to assemble it). Alternatively, for a perfect round shape, you can pipe the mixture, or you can even spread the mixture into the appropriate sized spring-form cake tin.
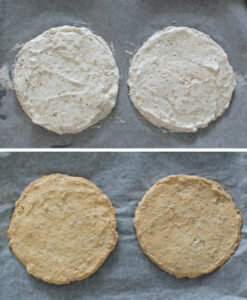
- Place the tray into the preheated oven and bake for about 14 minutes, or until the mixture is no longer sticky to the touch. It will be soft and spongey (which is what you want) and lightly coloured.
- Take the tray out of the oven and place on a cooling rack. Carefully lift the meringue (complete with baking paper) off the tray and place it on a flat surface. If you only have the one tray, let it cool down before starting on the second layer of meringue (i.e. placing the next square of baking paper on the cooled tray and spooning the meringue onto it). If you have two trays, you can alternate them and speed up the process. Repeat the steps until all 5 meringue layers are cooked and cooled.
For the Hazelnut Cream Filling
- The filling begins with a sabayon (cooked egg yolks and sugar) which is cooked in a double boiler. If you do not have a double boiler just take a small saucepan and fit a Pyrex or metal bowl into it so that it fits snugly and the bottom of the bowl is well above the base of the saucepan.
- Fill the saucepan with about 1-inch (2 cm) water. Place on the stove and bring the water to a slow boil (the water should not touch the bowl on top). Turn the heat down to low (you want a gentle simmer).
- Place the egg yolks into the bowl (on top of the saucepan) and, whisking constantly, add the sugar gradually. Keep whisking for 10-15 minutes, or until the mixture thickens and comes to ribbon stage (where, if you drop some of the mixture from your whisk, it should fall in ribbons, holding its shape briefly on the surface). Once done, take the bowl off the saucepan and put aside. Let the filling cool.
- Once cool, beat the cooked yolks for 30 seconds with an electric mixer.
- Now beat the butter (which should be at room temperature) for about 2 minutes until light and fluffy. Then add the butter into the cooked yolks and beat until combined. Add in the ground hazelnuts and beat again until combined (see image below).
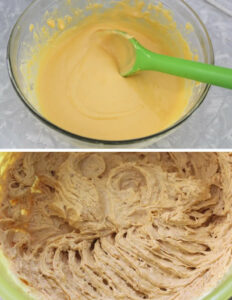
- Set aside about 3 tablespoons of the filling to spread around the cake at the end. Divide the rest of the filling evenly into 4 dishes or cups.
Assembly
- Carefully remove the baking paper from the bottom of one of the meringue layers (it should easily peel away) and place the meringue onto your cake dish, bottom-side-down. Spread one quantity of hazelnut cream filling evenly over the meringue using an off-set spatula.
- Remove the baking paper from the next meringue layer and place it directly on top. Repeat the process through the layers, making sure that the last layer is placed bottom-side-up, which will make it easier to obtain a smooth looking finish (see image below – as you can see my tardy edges have made it more difficult to spread the buttercream around the sides – I did resort to grabbing some scissors to neaten the edges!). Don’t place any filling on this top layer.
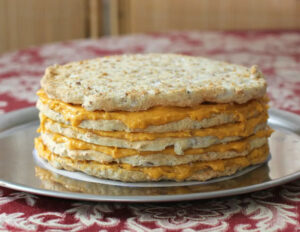
- Place some baking paper over top of the cake. Press gently, if needed, with your hands to even it out (you want the surface completely straight), and lay something like a smooth-bottomed tray over top to level it out (you might need to put some other object on top of the tray to ensure it has a bit of weight to it).
- Place the whole cake with the weight on top in the fridge for one hour.
For the Apricot Jam Glaze
- Heat the apricot jam and water on the stove for a couple of minutes on moderately low heat until slightly syrupy.
- Take the cake out of the fridge. Remove the tray and weight. Take off the baking paper and spread the jam on top of the cake with a warmed off-set spatula. You want a very thin layer, just barely covering the cake.
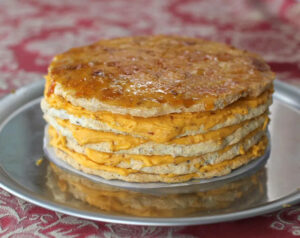
- Place the cake back in the fridge for 30 minutes for the jam to cool.
- When the 30 minutes is up, take the cake out of the fridge and spread the 3 tablespoons of reserved hazelnut filling around it, using a spatula.
- Put back in the fridge. Note: At this point, you can keep the cake in the fridge overnight and leave the decoration till the next day.
For the Lemon Icing
- Note: Before starting with the icing have the chocolate (see below) ready to go in its piping bag since it needs to be piped onto the unset icing.
- By hand, mix the powdered (icing) (confectioner’s) sugar, oil and lemon juice together. Then teaspoon by teaspoon add the hot water until the mixture is like a thick paste, but not runny (this is an important step; if the mixture is too wet it will run down the sides of the cake). Mix vigorously for a minute or two.
- With a hot wet spatula quickly spread the icing over the apricot layer (you won’t need all of it, but better to have more if it’s needed, than too little). Using a hot spatula should ensure the layer is smooth, however if it is a bit uneven use a hair-dryer to smooth it out.
For the Chocolate Piping and Decoration
- Melt the chocolate with a teaspoon of oil (either on the stovetop or in the microwave). Place in a piping bag, or a plastic bag with a cut in the corner that will act as the tip.
- Using the piping bag, draw four (4) concentric circles onto the cake. Then with a knife (not the sharp side) or a wooden skewer run six (6) lines at 30 degree angles to the cake to create the spider’s web. Each line should be dragged in a different direction – one dragged away from you and the next one dragged towards you.
- Put the cake into the fridge for 10 minutes or so to set up the icing. Then take it out and press the remaining chopped hazelnuts around the cake to complete the decoration.
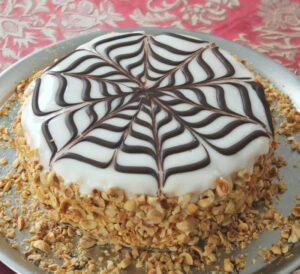
- Store the cake in the fridge for at least 24 hours before cutting. This cake gets better as times goes by and can be enjoyed for several days.





Beautiful! Your persistence is to be admired…I would have given up after the sugar not dissolving the first time!
Thanks Marcellina! Yes, I’m nothing if not doggedly persistent! Your own effort was a work of art!
Luckily, I decided to come back! I couldn’t figure out how to leave a comment few days ago:)) I will state the obvious and say that your cake looks gorgeous and repeat how much I admire your determination. It’s not a coincidence that you have such a lovely blog! Thank you for baking with me, it’s been a real pleasure for me:
Jelena – such a lovely compliment – thank you! And thanks so much for what has proved to be my biggest challenge on Daring Kitchen – I think the best challenges show you something about yourself, and this one sure did. It’s a challenge I’ll always remember. Thanks again!
Wow this sounds amazing. I made something similar last year from Smitten Kitchen and it was labor intensive. But so worth it. I’ve never heard of an Esterhazy torte before. Hmm so many birthdays to try this out on 🙂
Hi Lauren. Yes, I often wonder why I’d put in a day’s work into a cake only to have it eaten in minutes!! Oh well, I do enjoy the effort – it’s a good challenge.