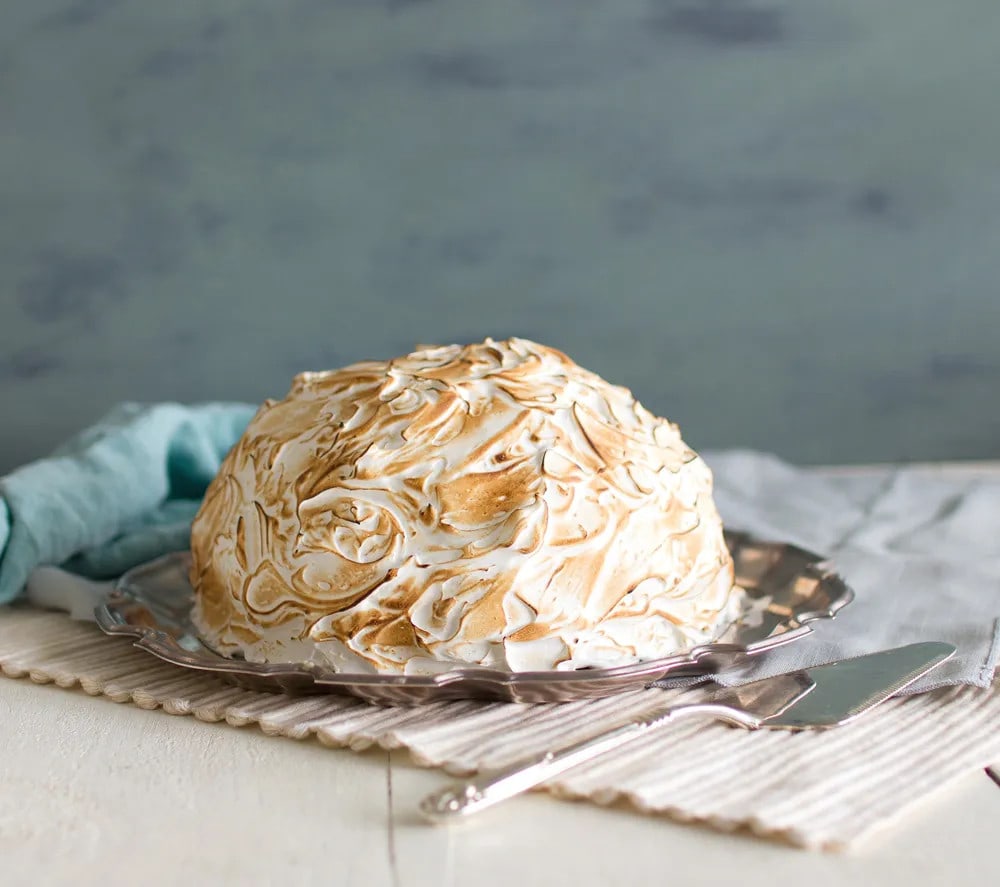
Ooh, have I got a super-duper dessert for you today – Boysenberry, Lemon & Ginger Baked Alaska!
Yes folks, this is one out of the hat – it’s so delicious, just looking at the photos has got me salivating and wishing I had a piece in front of me right now!
I’ve had a hankering to make a big daddy Baked Alaska after I made the lip-smackingly gorgeous mini Lemon Baked Alaskas way back at the beginning of the year. And holy-moly, now that I have, I wonder why on earth I waited for so long!
As I mentioned in that post back in January, I’d never even considered making something like this because it looked too darned intimidating. But, actually, while it does involve a fair bit of preparation, most of which you can do days ahead, it’s incredibly simple – not that you want to tell your guests that! Let them think you were up half the night preparing it!
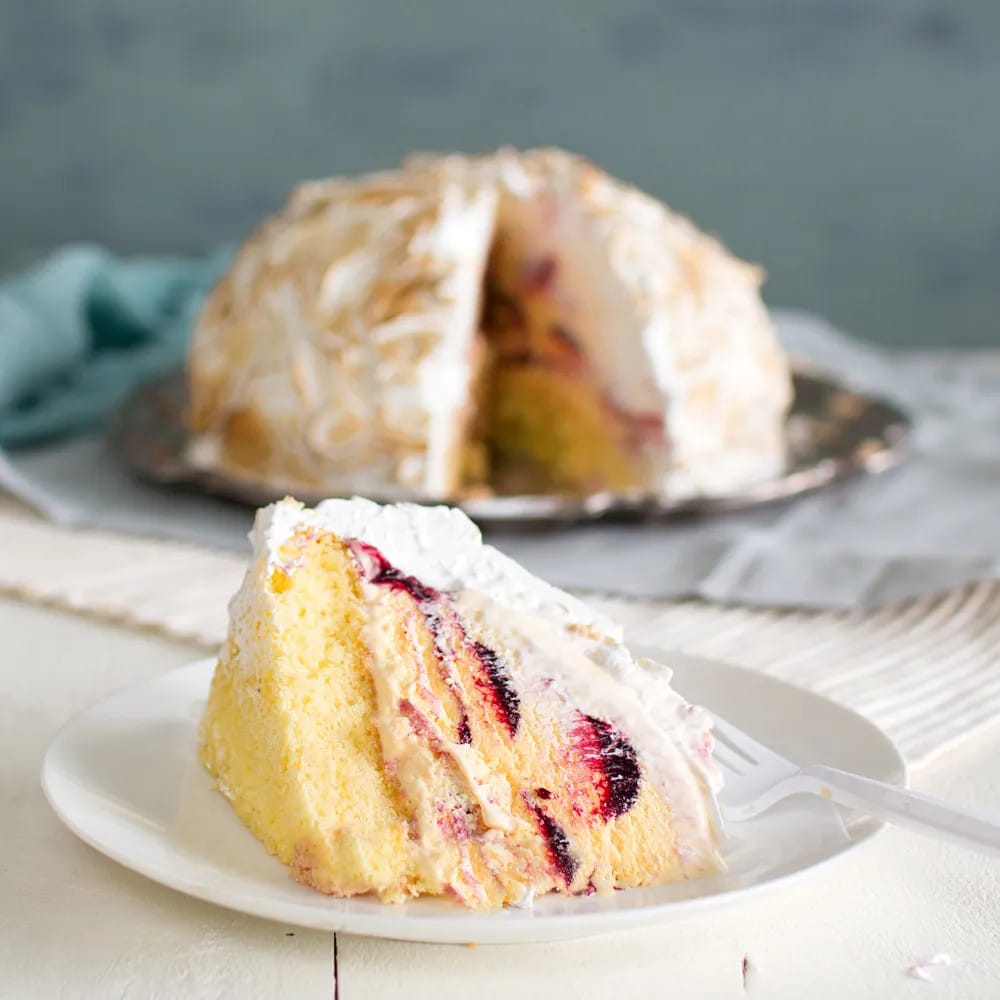
You can, in fact, make the ice cream and sponge components all ahead of time, with just the meringue to make on the day you’re serving it (check out my notes in the recipe to see how). And, never fear… the dessert doesn’t need to be eaten in one sitting – I’ve kept left-overs in the freezer for a further 24 hours with absolutely no deterioration whatsoever (thanks to the stability of the Italian meringue).
I borrowed from a couple of sources – the cake from Saveur, the ice cream from Serious Eats; the Italian meringue I used from the previous Baked Alaska recipe. I made a couple of adaptations along the way, substituting gluten-free flour for regular in the cake, and making the ice cream boysenberry flavoured rather than blackberry (though feel free to use blackberries if you prefer them). Oh, and reviewers of the original ice cream recipe found the amount of ginger too strong, so I’ve halved the amount, which worked well.
And, can I just say, that the result was pure culinary bliss! The Boysenberry, Lemon & Ginger Ice Cream is the absolute hero of the dish – it’s so good, I’ll be making it just on its own in the future. The ice cream itself is rich and creamy, while the additions of boysenberry syrup, along with the extra hit of ginger and lemon, just take it to a whole other level. Sublime.
This is now absolutely one of my all-time favourite desserts and, if you’re looking to truly ‘wow’ your guests, you can’t do much better than to serve this! Enjoy!
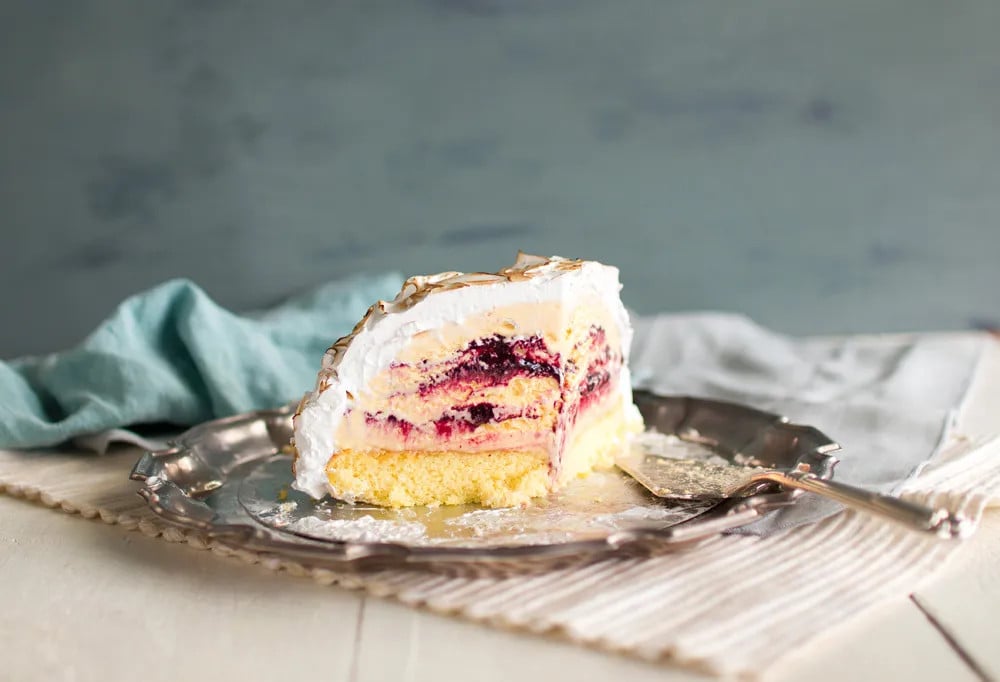
BOYSENBERRY, LEMON & GINGER BAKED ALASKA
Equipment
- 1 Food processor or Blender
- 1 Hand Mixer or Stand Mixer
Ingredients
For the ice cream:
- 2 cups heavy cream
- 1 cup whole milk
- Peel of two large lemons (removed with a vegetable peeler)
- 1 – 1-1/2 tablespoons minced ginger (I finely grated a large piece of ginger)
- 3-1/2 cups boysenberries (about 18 ounces, fresh or frozen)
- 1-1/4 cup sugar (divided)
- 3/4 teaspoon salt (divided)
- 6 egg yolks
For the sponge:
- 1/2 cup cake flour plus more for pan (I used gluten-free flour)
- 1/4 teaspoon salt
- 1/2 cup sugar
- 3 eggs
- 1 tablespoon fresh lemon juice
- 1/2 teaspoon grated lemon zest
- Optional: Some liqueur or syrup to brush over the cake (I brushed over some ginger syrup)
For the Italian meringue:
- 1 cup sugar
- 1/2 cup water
- 4 large egg whites or 5 smaller ones, at room temperature
- 1/2 teaspoon cream of tartar
Instructions
For the ice cream: (Make this at least a couple of days ahead)
- In a heavy saucepan, bring cream and milk to a simmer. Take off the heat and stir in lemon peels and ginger, cover, and remove from heat. Let steep for 1 hour.
- Purée boysenberries in a blender or food processor (if frozen, thaw first). Pour the purée through a strainer. Measure out 1-1/2 cups strained juice and discard boysenberry pulp. In a heavy saucepan, bring strained boysenberry juice to a simmer on medium heat and reduce to about 1/2 -2/3rds cup (or until syrupy), stirring frequently. Stir in 1/2 cup sugar and 1/4 teaspoon salt until dissolved. Transfer to a small container and chill in refrigerator.
- In a clean, heavy saucepan, whisk together 3/4 cups sugar with egg yolks until pale in color and thickened. When the milk/cream mixture finishes steeping, pour through a strainer into a jug (to remove the peel and ginger) and add a little into the yolk/sugar mixture as you whisk, to temper the eggs. Add the remaining milk/cream, continuing to whisk as you go.
- Put saucepan on medium-low heat and cook, stirring frequently, until a custard forms on the back of a spoon, but a finger swiped across the back leaves a clean line (you’re aiming for 170°F if using a thermometer). Add 1/2 teaspoon salt. Pour through a stainer into an airtight container and refrigerate overnight.
- The next day, churn in ice cream maker according to manufacturer’s instructions. While ice cream is churning, remove blackberry syrup from the fridge (it’ll be very thick, so stir to loosen).
- Transfer 1/3 of finished ice cream into a rounded mould (I used a hemisphere pan) or bowl where the circumference at the widest end is about the same size as the circumference of the cake tin in which the sponge will be baked, then quickly spread on half of syrup (it doesn’t need to be neat). Repeat, and top off with last 1/3 of ice cream NB: I actually created three fruit syrup layers rather than two.
- Put a layer of plastic wrap over top of the ice cream lightly and cover the whole pan with a couple of layers of foil. Chill in freezer until firm, at least over night.
For the cake: (Make on the day, or if making ahead see notes)
- Heat oven to 160°C (325°F). Grease and flour an 20 cm (8 inch) round cake pan (the pan can be slightly bigger or smaller to match up with the circumference of your ice cream mould – but you can always go with a bigger sized cake tin and then trim the sponge to fit) and line base with baking paper; set aside.
- Whisk together flour and salt in a bowl; set aside.
- Beat sugar and eggs in a bowl on medium-high speed of a hand mixer until tripled in volume, about 5 minutes. Stir in juice and zest; fold in flour mixture.
- Pour mixture into prepared pan; bake until a toothpick inserted in the middle comes out clean, about 25 minutes.
- Optional: While cake is still hot, brush over favourite liqueur or syrup. Cool completely, invert onto a rack, and set aside.
For the Italian meringue: (Make on the day, within a couple of hours of serving)
- Firstly, ensure the bowl you will be beating your egg whites in is scrupulously clean (I wipe the sides down with some vinegar). Check your beaters are also completely clean.
- In a small saucepan, combine sugar and water. Heat over high heat, brushing down sides of pot as necessary with a pastry brush dipped in water (this ensures the sugar doesn’t crystalize). Cook until sugar syrup registers 115°C (240°F) on a thermometer.
- Once the syrup starts to boil, combine egg whites and cream of tartar in the bowl of a stand mixer fitted with a whisk attachment. Set mixer to medium speed and mix until soft peaks form (when lifted, the head of the mixer should form gentle peaks in the egg whites that very slowly collapse back into themselves). At this point your sugar syrup should be close to the required temperature.
- With the mixer running, carefully and slowly drizzle in the hot sugar syrup – aim for the side of the bowl rather than the middle so as not to deflate the egg whites. Once it’s all in, increase speed to high and whip until stiff peaks. Move on to assembly straight away.
To assemble:
- If baking, pre-heat oven to 220°C (425°F). Otherwise, you can simply use a kitchen torch, as I did – an Italian meringue is already cooked, so baking is not actually required.
- If baking, place sponge on a baking paper-lined baking sheet; if not baking, place on a serving platter.
- Unwrap and invert ice cream onto sponge and peel off remaining plastic wrap.
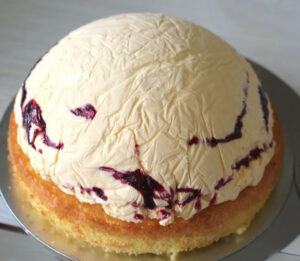
- Quickly, cover ice cream and cake with meringue (make sure you cover every bit including the sponge, as the meringue acts as an insulator), using your spatula to create swirls.
- If baking, place in hot oven and bake until meringue begins to brown, about 5-8 minutes (or just until you get a nice even browning). If using a kitchen torch, lightly brown the raised swirls.
- If you’ve baked the dessert, transfer it to a serving platter. Serve immediately. NB: If not serving straight away, you can store the whole Baked Alaska in the freezer – Italian meringue is very stable and the whole dessert will easily store, uncovered, in the freezer for at least 24 hours. If serving straight from the freezer, let the dessert stand for 10-15 minutes before serving for the ice cream and sponge to soften a little – don’t worry, the ice cream is fully insulated by the meringue and takes quite a while to start melting.





Oh WOW. Baked alaska is always a wow-worthy dessert but you’ve really done something special here. Brilliant!
Hey Jessie! Thanks for the lovely compliment!! 🙂