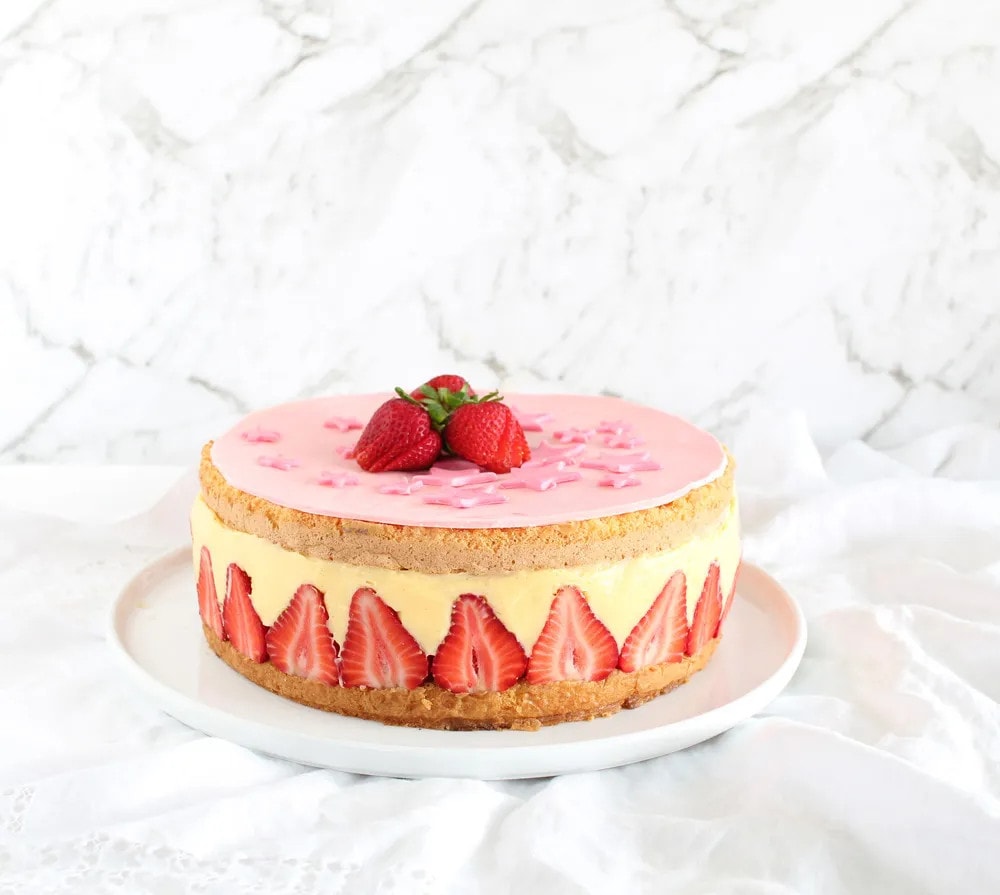
Phew, this Gluten-free Fraisier Cake was quite an undertaking! And believe it or not, I made it two weeks in a row! The first time was for my big brother’s birthday; the second time was simply because I felt I could improve on it and needed to make it while it was still strawberry season. Perfectionist much?
I have wanted to make this French specialty cake for YEARS, but for some reason I’ve just never had the right window of opportunity. Last year, for instance, we had a drought and strawberries were few and far between, not to mention expensive. This year, however, we’ve had a nice balance of rain and sunshine leading up to Christmas and strawberries have been plentiful. Finally!!
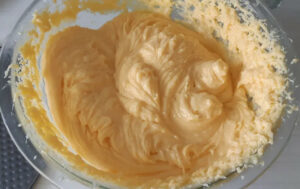
I borrowed the basic recipe from Mary Berry, but adapted the cake to be gluten-free (and very successfully, I might add!). I also reworked the crème pâtissière element. The first time I made the cake, I found the creme to be extremely thick and a little lumpy (not unlike mashed potato!), making it difficult to pipe. So I did a little research and discovered that beating the chilled creme with a little butter ensures an extra smooth, light result. I tried it the second time around and found it much easier to pipe; it also made the finished cake look far more professional. As for the marzipan layer, I’m aware that it’s a bit polarizing for people, but actually we all felt it provided a nice contrasting flavour and texture. It also beautifully echoed the flavour of the cake which was made with ground almonds.
This gluten-free Fraisier Cake is a pretty spectacular show-stopper cake and is worth the 2.5 to 3 hours it takes to make it. It might not be a walk in the park exactly, but each component is easy enough to make. It’s the construction where things can get a bit fiddly, but it definitely looks trickier than it is. I found the process was a breeze the second time I made it and I learned a few things along the way too:
- use acetate to encircle the cake instead of plastic wrap if you can, it makes for a straighter edge
- try to cut the sponge exactly in half horizontally, otherwise the finished cake will look out of balance
- the crème pâtissière holds well, but only just (which is how you want it), so keep it chilled and don’t remove the tin until you serve it
- try and use similar sized strawberries on the exterior of the cake for an even finish
- the cake keeps well for a second day – it may not retain its perfect shape once cut into, but we found the flavours were actually better
And, speaking of flavour, if you like trifle you’ll LOVE this cake. In fact, more than one member of the family likened it to a fancy trifle, which I tried not to take personally! LOL. We adored the combination of lemon soaked genoise sponge, tart strawberries and to-die-for kirsch spiked crème pâtissière, with just a hint of sweet marzipan to finish it off. Who wouldn’t??! Enjoy!


GLUTEN-FREE FRAISIER CAKE
Equipment
- 1 Electric Hand Whisk
Ingredients
For the cake:
- 2.5 oz ground almonds (almond flour)
- 2.6 oz cornflour (cornstarch)
- 1 teaspoon G/F baking powder
- 4-1/2 oz caster (superfine) sugar
- Pinch of salt
- 4 free-range eggs
- 2 lemons, zest only, finely grated
- 1-3/4 oz unsalted butter, melted and cooled slightly, plus extra for greasing
For the crème pâtissière:
- 20 fl oz milk
- 1 vanilla pod, or teaspoon of pure vanilla paste
- 4 free-range eggs, plus 2 free-range egg yolks
- 6-1/4 oz caster sugar
- Pinch of salt
- 1 tbsp Kirsch liquor
- 3-1/2 oz cornflour (cornstarch)
- 5-1/2 oz butter, cut into cubes at room temperature
For the lemon syrup:
- 2-3/4 oz caster (superfine) sugar
- 2 lemons, juice only
- 4-1/2 tbsp water
To construct the cake:
- 7 oz marzipan plus colouring
- 7 oz Optional: dark or white chocolate, for decoration
- 1lb 3 oz medium sized strawberries (I actually used 3 punnets – (1lb 6 oz)
Instructions
For the cake:
- Preheat the oven to 180C/350F/Gas 4. Grease, flour and line the base of a 23cm/9in spring-form or round loose bottom cake tin.
- Sift the ground almonds, cornflour and baking powder together into a bowl and put aside.
- Place the sugar, salt, eggs and lemon zest in a large bowl set over a pan of simmering water.
- Using an electric hand whisk, whisk the mixture over a medium heat until doubled in volume and pale in colour. The mixture is at the right stage when it forms a ribbon trail briefly when the whisk is lifted out of the mixture. Remove from the heat.
- Add two-thirds of the sifted flours into the whisked eggs and fold in gently with a metal spoon or spatula. Add the remaining third and fold again. Try to keep in as much of the air as possible and make sure all the flour is incorporated into the mixture.
- Gently fold in the slightly cooled melted butter.
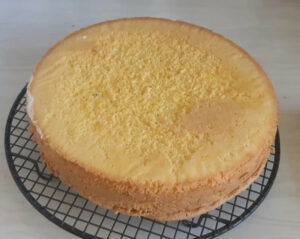
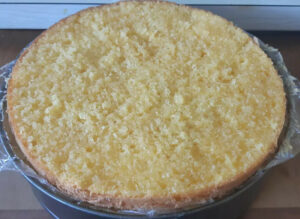
- Pour the mixture into the cake tin and bake for 25-30 minutes or until the sides of the cake begin to come away from the tin and it is pale golden-brown.
- When cooked, allow the sponge to cool a little bit in the tin, then turn out onto a cooling rack.

For the crème pâtissière (Can be made the day before):
- Pour the milk into a wide based pan, split the vanilla pod along its length using a sharp knife, and add it to the milk along with the vanilla seeds (alternatively add the vanilla paste). Bring the milk just up to the boil, then take it off the heat.
- Whisk together the eggs, sugar, salt, kirsch and cornflour in a medium sized bowl until blended.
- Remove the vanilla pod from the milk and pour the hot milk through a sieve into the egg mixture. Whisk to combine.
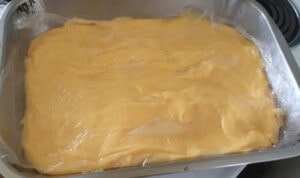
- Pour the custard back into a clean saucepan and set over a medium heat. Whisk the custard constantly until the mixture thickens (which will take about four minutes). Continue to whisk until the mixture is smooth and very thick. Stir in about a third of the butter (100g) until thoroughly melted and combined (retain the rest of the butter for later).
- Allow to cool slightly, pour into a shallow dish (to allow it to cool faster), cover in plastic wrap and chill in the fridge for about an hour.
- When it’s cool, take it out and add the remaining 50g butter and using hand-held electric beaters, beat until the mixture is light and smooth.
- Spoon it into a large piping bag and put back into the fridge until needed.


For the lemon syrup:
- While the cake is cooling, place the ingredients for the lemon syrup in a small saucepan with the water. Heat gently until the sugar dissolves, then boil rapidly for two minutes. Remove from the heat and set aside to cool. The syrup wants to be liquid enough to brush over the cake; if you find the mixture begins to set like a soft toffee, add a little hot water and whisk until it’s the right consistency.
For the marzipan:
- Roll out a thin disc of marzipan (you can colour it with a drop or two of pink or green if you like) to fit a 23cm/9in circumference circle (for a perfect circle, use a marker to trace around the inside of the baking tin onto a piece of baking paper, cut out the circle, then place it over the rolled marzipan; then simply cut around the circle with a sharp knife). For a perfectly flat surface, chill the disc in the fridge until it is needed.
To construct the cake:
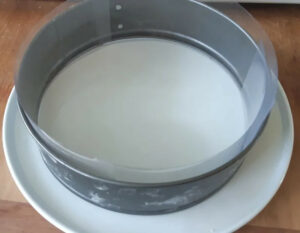
- Place the cake tin ring (but not the base) onto a serving plate. Place a strip of acetate plastic (or plastic wrap) around the inside of the springform tin.
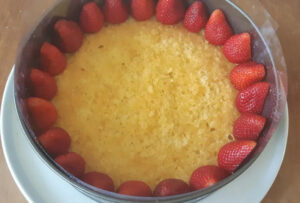
- Slice the sponge in half horizontally, creating two slim discs of cake. The cut must be as level as possible as it will be visible in the finished cake. Place one layer of sponge cake in the bottom of the cake tin (cut side up). Then liberally brush the sponge with half the syrup.
- With the back of a spoon, gently squash the edges of the cake down so that they are pushed directly against the sides of the tin, creating the defined edges necessary for the Fraisier cake.
- Rinse, hull and halve about 12-15 strawberries, try and make sure they are all the same height.
- Place the cut sides of the strawberries on top of the sponge base, against the acetate on the inside of the tin. The strawberry halves should be sitting snugly beside each other.
- Take the piping bag of chilled crème pâtissière out of the fridge and snip off the end of the bag.
- Pipe a swirl covering the exposed sponge completely in the bottom of the tin.
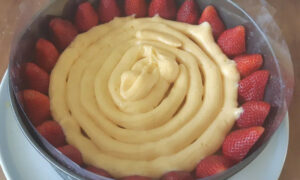
- Then pipe between each of the strawberries so the gaps are filled right to the top with the crème pâtissière.

- Use an offset spatula to gently level the creme and push it into the crevices around the strawberries.
- Set about 3-5 strawberries to one side for decoration, then hull and chop the rest of them and place evenly on top of the crème.
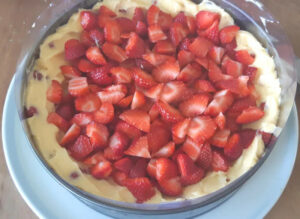
- Pipe another swirl of crème pâtissière on top of the cut strawberries to cover the whole surface, then smooth with a palette knife.

- Place the other disc of sponge on top of this, with the cut side uppermost, so it has a completely flat top. Brush with the remaining syrup.
- Gently press the top down, so that the cake and filling push against the acetate.
- Lay the chilled marzipan circle on top of the cake. Then put the whole thing back in the fridge to set for at least 2-3 hours.
- Meanwhile, make some decorations of your choice with melted dark or white chocolate or make some marzipan cutouts to lay on top (I added a couple of extra drops of colouring to some of the marzipan scraps to make a darker shade of pink, made some star cutouts, and adhered them to the cake with some of the lemon syrup).
- When ready to serve, remove the cake from fridge. Very carefully release the spring tin/loose bottom and remove the cake from the tin and from the acetate or cling film. The custard will probably need a bit of a touch-up as it may adhere partly to the acetate – simply use a warm offset spatula to smooth it out.
- Decorate the top with reserved strawberries and chocolate or marzipan decorations. Serve immediately. NB: The cake can be stored in the fridge for a further day.


Hi Susan, I really enjoy your recipes and posts. I dont seem to be able to see any comments or conversations about your posts? Do I need to log on somewhere else to read other peoples comments?
Hi Fiona. Lovely to hear from you. You’re right, there aren’t that many comments on my blog, but what there are you’ll find at the bottom of a post. For instance, check out some of the ‘popular posts’ on the right panel – you should see comments in there. Hope that helps. 🙂
Hi Susan! Thank you for the gluten free recipes.
You’re most welcome Ana! 😀