Tarte Tatin (tar-ta-tarn) was first created accidentally at the Hotel Tatin (in a town just out of Paris) in the 1880s. It’s said that one of the Tatin sisters who owned the hotel started making a traditional apple pie but overcooked the apples and, so as not to waste them, placed some pastry over top and put the whole pan in the oven to cook before upturning it to serve. It’s said the hotel guests so enjoyed the results that it became an instant classic.
Like the other French classics, this dessert has been on my to-do list for ages. And I hasten to add that I’ve already tried knocking it off the list a few times and they’ve been total disasters – that dang caramel never seemed to cook properly and I ended up with insipid, ultra-sweet syrup rather than the sticky, dark caramel this dessert is famous for.
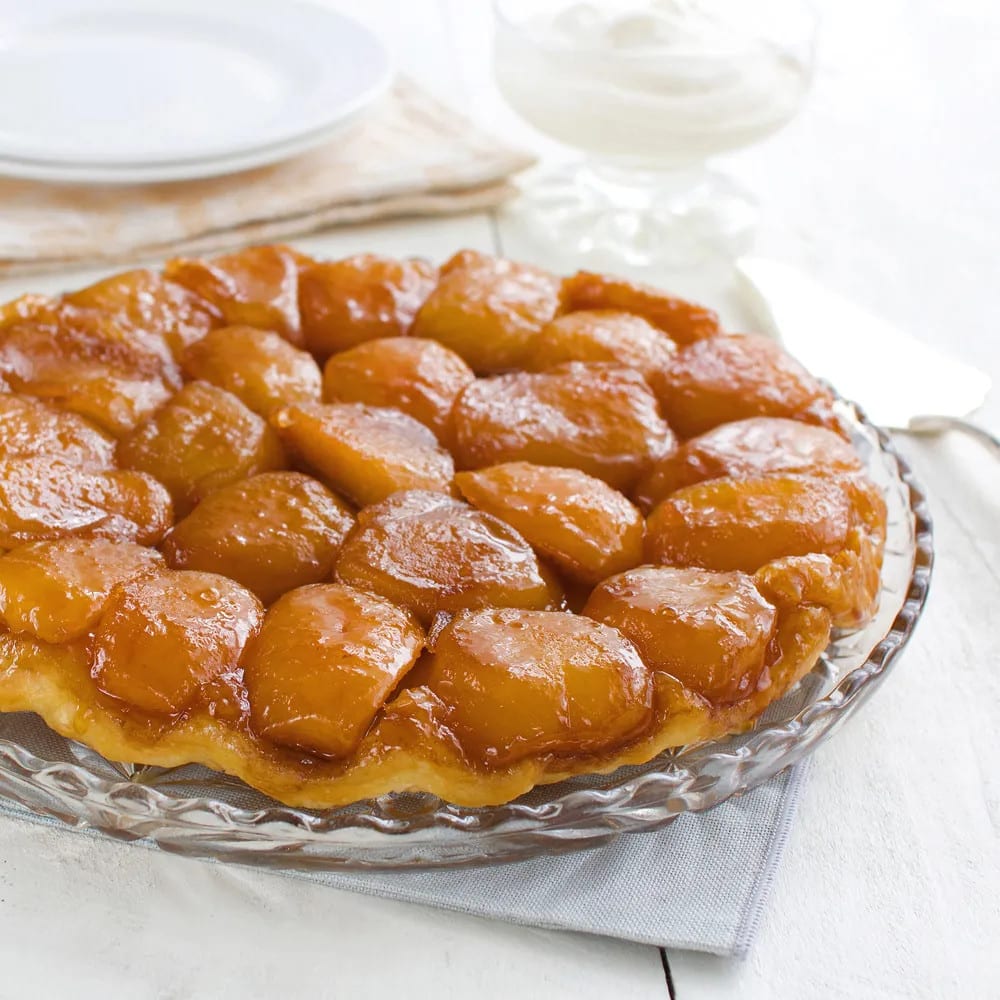
It looked like I was going to meet the same embarrassing fate this time around as well. Caramel #1 burnt; caramel #2 ended up like rubble. Thankfully caramel #3 pulled its act together and we had lift-off. From there, the process was pretty darn easy. And the result? Richly caramelized apples encased in a puff pastry that softens a little as it absorbs the juices, yet retains its crispy exterior and distinctive chewy caramelized edges. Pair it with a good dollop of freshly whipped cream and you’re in culinary heaven.
There’s a reason this classic French dessert has stayed the course for well over 100 years – it’s sinfully delicious, end of story.
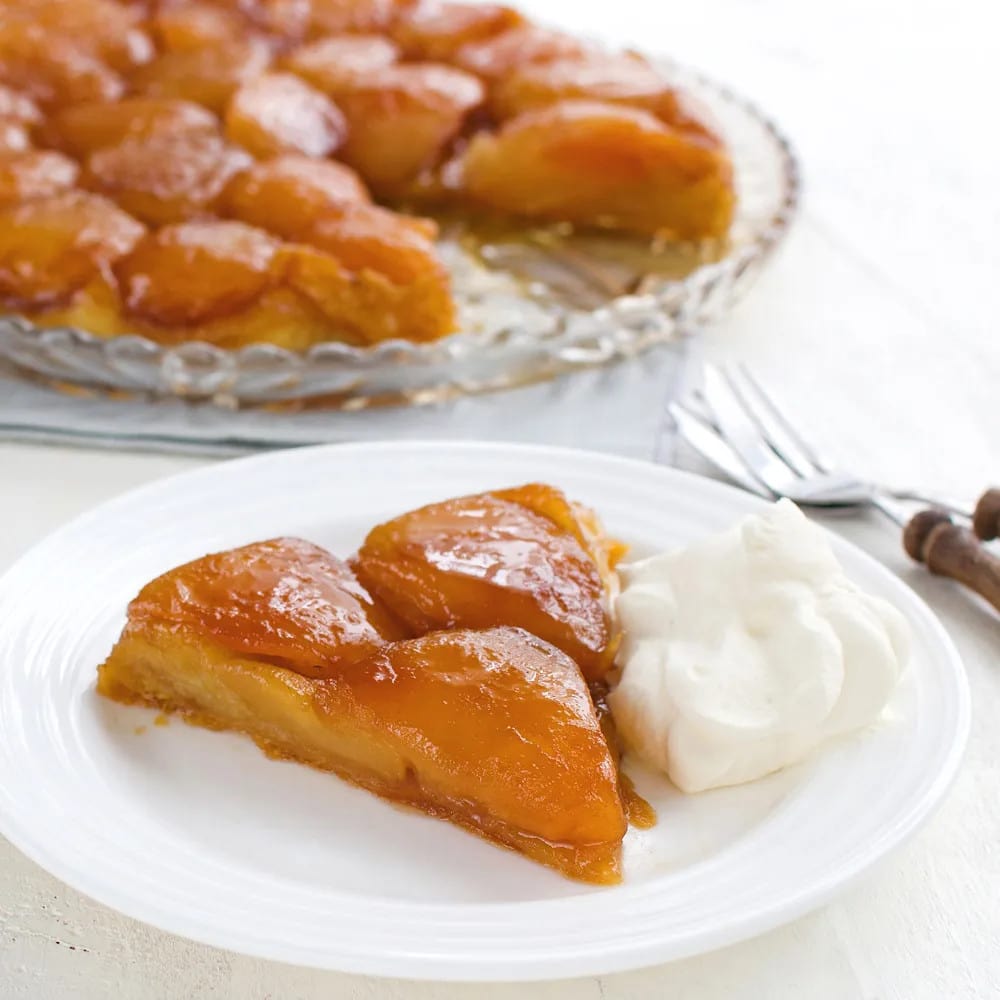
APPLE TARTE TATIN
Ingredients
- 6 large or 7-8 medium-sized apples (choose a variety that holds its shape while cooking)
- Juice of half a lemon
- 3 oz unsalted butter (or use salted and skip the salt)
- 1-1/3 cups granulated sugar,divided
- Pinch salt
- About 250g-300g Quick Puff Pastry (if you want to make home-made, try using this recipe and halve it, or use 1 sheet commercial Puff Pastry)
Instructions
- If making the Quick Puff Pastry, follow the directions here and put it into the fridge to chill at least 3 hours before beginning the Tarte Tatin.
- Peel the apples and cut them into quarters. Remove the cores in such a way that each apple quarter has a flat inner side: when placed rounded-side-up, it should sit on a flat base. Place the apples in a large bowl and toss with the lemon juice and 1/3 cup (2-1/2 oz) (65g) sugar. This will help draw out some of the moisture from the apples and prevent an overly runny caramel. Set aside for 15 minutes.
- Preheat the oven to moderately hot 375˚F/190°C. Melt the butter in a very heavy, 9” or 10” (23 cm or 24 cm) oven-proof saucepan over medium heat, then sprinkle with the remaining 1 cup (7 oz) (200 g) sugar. Stir with a whisk until the sugar melts and becomes a pale, smooth caramel .The sugar will seem dry and chunky at first, then will start to melt and smooth out. If the butter appears to separate out from the caramel, just keep whisking until it is a cohesive sauce (be careful it doesn’t burn)* See below for notes on caramel making. When done, remove from the heat.
- Discard the liquid that has come out of the apples, then add the apple quarters to the caramel. They won’t all fit in a single layer at first, but as they cook they will shrink a bit. Cook over medium heat for 15-20 minutes, gently moving them and turning them so they cook evenly and get covered in the caramel (be extremely careful – the caramel is boiling). When the apples have shrunk enough to mostly fit in a single layer and are starting to soften but still keep their shape, remove the pan from the heat.
- With a wooden spoon or tongs, arrange the apples, round side down, in a single layer of concentric circles covering the bottom of the pan. Set aside until the filling stops steaming before covering with pastry.
- Remove the bought or home-made pastry from the fridge, roll it out on a lightly floured surface, and trim it into a circle about 1” (25 mm) in diameter larger than your saucepan. Lay it over the filling, tucking in the edges between the apples and the sides of the pan, and cut a few steam vents in the pastry. Place the saucepan on a rimmed baking sheet (just in case the filling decides to bubble over the sides) and place in the preheated oven. Bake for 30-35 minutes, until the pastry is puffed and golden brown, increasing the oven temperature to 400˚F/200°C during the last 5 – 10 minutes of baking if the pastry isn’t browning properly.
- Remove from the oven and let sit just until the caramel stops bubbling (don’t let it cool before turning it out, as the caramel will set and the fruit will stick to the pan). Immediately place a serving platter (slightly larger in diameter than the saucepan) over the pastry. Wearing oven mitts, grab hold of the saucepan and platter and quickly invert everything to unmold the Tatin onto the platter. If any of the apples stick to the pan or come out of place, rearrange them with a spatula. The tarte Tatin can be served warm from the oven or at room temperature. Suggested accompaniments include vanilla ice cream, whipped cream, or crème fraîche.
Notes
- Don’t worry too much if your caramel doesn’t set up perfectly to begin with. My mixture was a bit of a mess – it simply wouldn’t turn into a sauce. In fact it started to turn hard like toffee but once it achieved the right caramel colour, I added the apples anyway and miraculously as it cooked and combined with the apple juices, the sauce came together perfectly.
- Judging by all the Tarte Tatin recipes out there, there seems to be a multitude of ways to make the caramel – some people make a sugar caramel first, then add the butter at the end; others make the caramel the same as this recipe, but insist you shouldn’t stir the caramel at all; yet others add the butter, sugar and apples all at once, add the pastry and pop it in the oven without any pre-cooking. Suffice it to say, if this technique doesn’t work for you, maybe you’ll have better luck with one of the others.
- Tarte Tatin doesn’t keep or store particularly well: it is best served warm from the oven, but can also be served at room temperature the same day it is made. If you’re not serving it straight away, you can simply keep the tart in the pan without flipping it over until you’re ready to serve – that way the pastry won’t soften too much. If you want to serve it warm, simply pop it back into the oven at the same temperature you baked it at, for around 10-15 minutes. Otherwise (and thanks to Kernan for this tip), pop it on the stove element on a low-medium heat until the caramel is runny, run a spatula around the edge of the pastry, give the pan a gentle whack a couple of times to release the apples and invert.
- You can add a sprinkle of cinnamon and some zest of an orange to the caramel as it’s cooking for extra flavour (thanks to Jamie Oliver for this suggestion).



Stopping over from the Daring Bakers… well done! Your tart tatin looks beautiful! You have a lovely site as well 🙂
Thanks so much Liz – and yours too, might I add! I’m looking forward to seeing everyone else’s posts too!
It has been TOO long since I’ve made a tarte tatin. Thanks for the inspiration – I definitely will be making one soon!
Glad to be your source of inspiration Thalia! I can’t wait to make my next one!
Perfect! Caramelized apples look delicious. I lost my caramel during baking because of bad pan :-), but in the end everything was good :-).
Hi Michaela. Yep, I had an issue with my pan too, so I made the caramel in one pan and then transferred it to another to be cooked. A bit fussy, but I got there in the end too!
I’m glad you persevered on the caramel – third time’s the charm! Gorgeous tarte Tatin 🙂
Thanks Korena – and thanks for such a great challenge! Keep ’em coming!
did that too, delicious
Beautiful post and photos – we all know the pains of burnt caramel and for me before I even get it to the table people have eaten half my tarte tatin! I have a slightly different way of making it which stacks the apples end on end – I love it. Hope you like it too http://timedeating.co.uk/?p=686
Thanks for stopping by! Enjoyed looking at your version too – you can’t really go wrong with apples and crisp pastry eh..