This was a really fun cooking experience. I’d expected them to be tricky to make, but actually they were a breeze.
They looked and tasted sensational too! I served them with a lemon curd mousse for dessert and they were a perfect complement, neither over-powering nor underwhelming. But they were so good, that they would make a lovely treat all on their own with a nice pot of tea. Will definitely be making them again! This recipe was sourced from Chef Eddy.com – I only slightly adapted it, doubling the amount of orange zest.

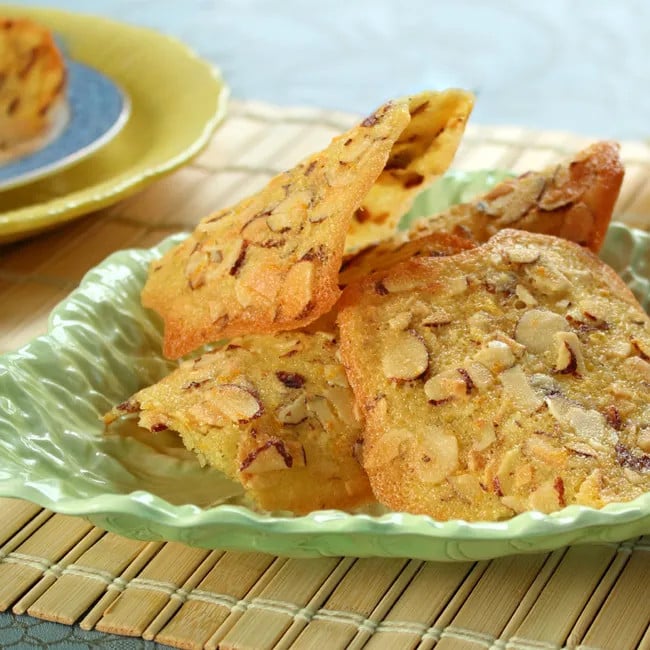
ALMOND & ORANGE TUILES
Get ready for a delightful cookie treat! These Almond & Orange Tuiles are thin and crispy, with a yummy orange flavor and bits of toasted almonds throughout. They've got a cool curved look that makes them fun to eat, and they're perfect for a fancy party or just a relaxing afternoon snack.
Ingredients
- ¾ cup caster sugar
- ½ cup egg whites
- 1 tsp vanilla extract
- ¼ tsp Salt
- 5 Tbsp all-purpose flour
- 4 Tbsp unsalted butter plus a little extra for brushing on baking paper
- 1¼ cup sliced almonds, pre-toasted
- 2 tsp orange zest
Instructions
- Combine sugar, egg whites and vanilla in a bowl and whisk to combine. Add the salt and flour and mix again.
- Add the melted butter, orange zest (I doubled the amount) and toasted almonds. Put aside.
- Brush the extra melted butter on some baking paper on your oven tray and let it solidify.
- Drop teaspoon amounts of the biscuit mix onto the buttered paper and flatten into disk shapes using the back of a fork. The biscuits spread quickly (you’ll be surprised!), so don’t be tempted to use anything bigger than a teaspoon, and make sure you leave plenty of space between them.
- Bake at 200°C (400°F) for about 6-8 minutes – you’re looking for brown edges and golden in the middle. (Do not under-bake – if you do they’ll be chewy rather than crisp). If needed, rotate the baking sheet half way through cooking.
- Remove the biscuits from the oven, and leave for 30 seconds to one minute. Then gently use a metal spatula to lift the cookies off the tray, and place on a rolling pin or similar shaped object to obtain the tuile shape. Otherwise, you can leave them flat. If the cookies become too rigid to roll, return them briefly to the oven to soften.
- Once they’ve cooled, place the biscuits in a sealed container. It’s apparently best to eat them on the day of making them.
Nutrition
Calories: 77kcalCarbohydrates: 9gProtein: 2gFat: 4gSaturated Fat: 1gPolyunsaturated Fat: 1gMonounsaturated Fat: 2gTrans Fat: 0.1gCholesterol: 5mgSodium: 33mgPotassium: 46mgFiber: 1gSugar: 7gVitamin A: 59IUVitamin C: 0.2mgCalcium: 14mgIron: 0.3mg
Tried this recipe?Let us know how if you liked it in the comments below!