
MINI RAW CHOCOLATE CREAM TARTS
Equipment
- 1 Food processor or Blender
Ingredients
For the base:
- 1/2 cup whole almonds or any nut you prefer
- 1/2 cup soft Medjool dates, pits removed
- 1/4 cup raw cacao powder (if you can’t access it, use cocoa powder)
- 1 tsp pure vanilla extract
- 1/4 tsp sea salt
- Optional: 1 tsp pure maple syrup or as needed
- 1 tbsp coconut oil, melted (or as needed)
For the filling:
- 1-1/2 cups raw cashews, soaked in water for at least 5 hours, or overnight
- 1/3 cup coconut oil, melted
- 1/3-1/2 cup pure maple syrup or honey or agave nectar, to taste
- 1 tsp pure vanilla extract
- Scant 1/2 cup raw cacao powder or cocoa powder
- Up to about 1/3 cup filtered water or as needed
Instructions
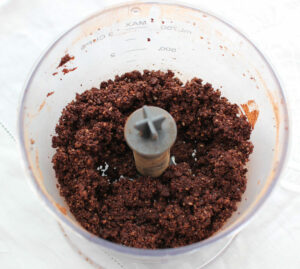
For the base:
- Place all the ingredients (except the coconut oil and maple syrup) in a food processor and pulse to blend until you’re happy with the texture (process longer for a finer texture). At this point, I suggest you taste the mixture – if it needs a touch more sweetening, add in the maple syrup.
- Now you need to test the moisture of the base by spooning out a small amount of mixture and rolling it in your hands. If the ingredients hold together, your base is perfect. If it’s not quite there yet, add up to a tablespoon of coconut oil until the moisture level is right.
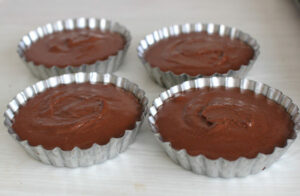
- Divide base mixture into lightly greased 6 or 12 hole muffin pans, mini cheesecake pans, or individual tart moulds (preferably with removable bases). Press the mixture firmly, making sure that the edges are well packed and that the surface is even. If making ahead, you can pop the bases into the fridge or freezer. NB: If you have some base mixture left over, roll it into truffle-sized balls and store in the fridge – makes a wonderful sweet snack!.
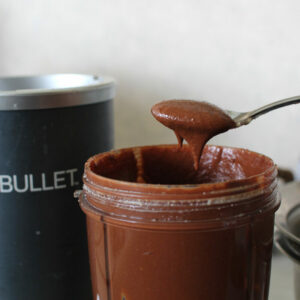
For the Filling:
- Warm coconut oil in a small saucepan or fry pan on low heat until just melted. Let it cool.
- In your most powerful food processor/blender place all filling ingredients, including the melted coconut oil.
- Pulse initially to break down the nuts, then blend on high until very smooth (this make take a couple of minutes and you will probably need to stop occasionally and scrape down the sides of the blender). If the mixture is too thick and it’s not blending smoothly, add a little water (up to a third of a cup may be necessary) and continue to process until smooth – the end result should be thick and gloopy (but not runny). Give it a taste to check on its flavour and sweetness and adjust as needed.
- Divide the filling between the pans over top of the bases. Put into the freezer until solid.
- Remove the tarts from freezer about an hour prior to eating and allow to thaw either at room temperature, or in the fridge (the more they thaw, the creamier they will be). They are more easily removed from the pans while they are still frozen – for muffin pans, simply warm a fine spatula or knife and run around the edges until the tarts pop out.
- Serve the tarts with fresh berries (raspberries are best) and perhaps some raw chocolate sauce or cashew cream.
Tried this recipe?Let us know how if you liked it in the comments below!